Car Dash Cam to Facebook Reels – An interesting technology journey.

Well, it started to be a really interesting technology journey as I am a core and loyal Ubuntu Linux user. On top of that I always am on the lookout to sharpen my DevOps instincts and skillset. Some people do say that it is because that I am quite lazy to do repetitive tasks the manual way. I don’t care about these useless comments. The situation is that like all car dash cameras, this one also will record any activity in front or back of the car at a decent resolution of 1280 × 720 but as one file each 5 minute. The system’s inherent bug was that it won’t unmount the sdcard properly; hence, to get the files, it need to be mounted on a Linux USB sdcard reader. The commands that I used to combine and overlay these files were combined and formatted into a shell script as follows:

#!/bin/bash

 find ./1 -type f -size +0 | sort > ./fc.txt
 sed -i -e 's#./#file #' ./fc.txt 

 find ./2 -type f -size +0 | sort > ./bc.txt
 sed -i -e 's#./#file #' ./bc.txt 
 
 ffmpeg -f concat -safe 0 -i ./bc.txt -filter:v "crop=640:320:0:0,hflip"  bc.mp4
ffmpeg -f concat -safe 0 -i ./fc.txt -codec copy -an  fc.mp4

ffmpeg -i fc.mp4 -i bc.mp4 -filter_complex "[1:v]scale=in_w:-2[over];[0:v][over]overlay=main_w-overlay_w-50:50" -c:v libx264 "combined.mp4"

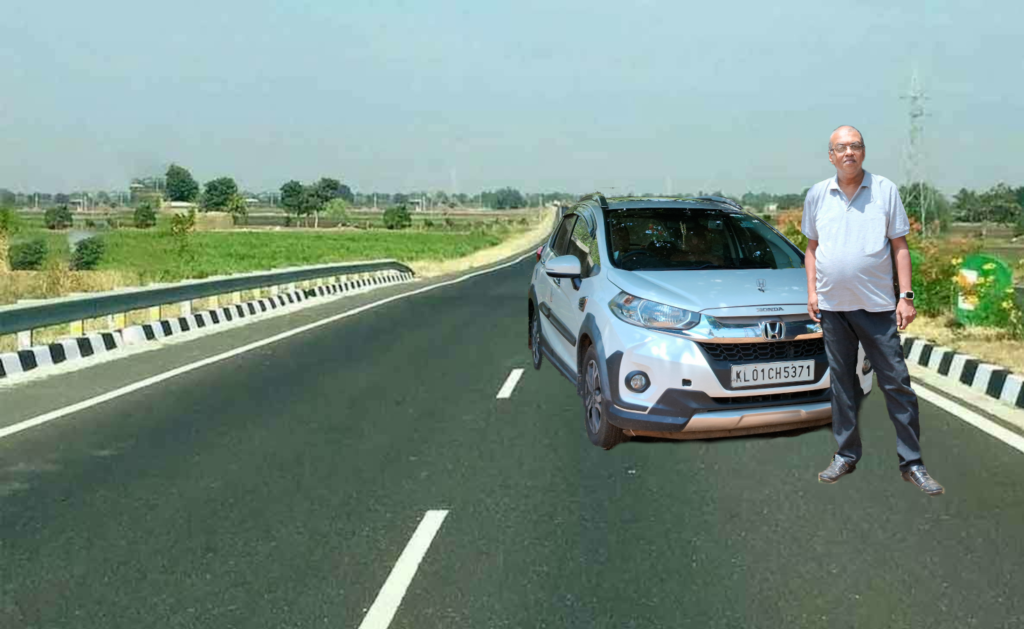
To explain the above shell script, the find (./1 and ./2) dash cam saves front cam files in “./1” and rear cam files in “./2” and the filters make sure only files with minimum size greater than 0 will be listed and as the filenames are timestamp based the sort will do its job. The sorted listing is written into fc.txt and then sed used to stamp each filename with a text “file” at the begening which is required for ffmpeg to combine a list of files. The lines 3 and 4 does the sequential combine of rear cam and front cam files and the final one resizes the rear cam file and inset over the front cam file at a calculated width from right side top offset of 50 pixels. This setup was working fine till recently when the car was parked for a long period in very hot area when the camera mount which was using a kind of suction to the windscreen failed and the camera came loose, destroying the touch screen and functionality. As I had already been hooked to the dashcam footage, I got a mobile mount and started using my Galaxy M14 mounted to the windscreen.

Now there is only one camera and that is the front one, but I start the recording before engaging gears from my garage and then stop it only after coming to a full halt at the destination. This is my policy and I don’t want to get distracted while driving. Getting a facebook reel of 9:16 and less than 30 seconds from this footage is not so tough as I need to crop only 405×720 but the frame start location in pixels as well as the timespan is critical. This part I am doing manually. Then it is just a matter of ffmpeg crop filter.

ffmpeg <input> -ss <start> -t <duration> -vf crop=405:720:600:0 -an <output>

In the above command, crop=width:height:x:y is the format and this was okay until the interesting subject was at a relative stable position. But sometimes ther subject will move from left to right and cropping has to happen in a pan motion. For this I chose the hard way.

  1. Crop the interesting portion of the video by timeline without resolution change.
  2. Split frames into png files ffmpeg <input> %04d.png as long as frames are less than 1000 (duration * 30) 4 should be okay if not the padding has to be increased.
  3. Create a pan frame configuration in a text file with framefile x y on each line.
  4. Use image magic convert by looping through the above file say pos.txt
cat pos.txt | while read fn x y ; do convert ff/$fn -crop 405x720+$x+$y gg/$fn

Once this is completed, then use the following command to create the cropped video with pan effect.

ffmpeg -i ff/%04d.png -r 30 cropped.mp4

Well by this weekend I had the urge to enhance it a bit more, with a running clock display along the top or bottom of every post-processed video. For the same after some thoughts I created an html page with some built in preference tweaks saving all such tweaks into localstore effectively avoiding any serverside database or the sort. I have been benefitted by the Free and Open Source movement, and I feel it is my commitment to provide back. Hence the code is hosted on AWS S3 website with no restriction. Check out the mock clock display and if interested view the source also.

With the above said html, a running clock display starting from a timestamp and runs for a supplied duration with selected background and foreground colors and font size etc is displayed on the browser. I capture this video using OBS on my laptop, builtin screen recorder on my Samsung Galaxy Tab S7 FE and then use ffmpeg to crop the exact time display from the full screen video. This video is also split into frames and corresponding frames overlayed on top of the reel clip frame also using convert and the pos.txt for the filenames.

cat pos.txt | while read fn x y ; do convert gg/$fn tt/$fn -gravity North -composite gt/$fn ; done

The gravity – “North” places the second input at the top of the first input whereas “South” will place at the bottom, similarly “East” and “West” and “Center” is also available.

Automating Church Membership Directory Creation: A Case Study in Workflow Efficiency

Maintaining and publishing a church membership directory is a meticulous process that often requires managing sensitive data and adhering to strict timelines. Traditionally, this would involve significant manual effort, often taking days to complete. In this blog post, I will share how I streamlined this process by automating the workflow using open-source tools. This approach not only reduced the time from several hours to under 13 minutes but also ensured accuracy and repeatability, setting a benchmark for efficiency in handling similar projects. Specifically it should be noted that the complicated sorting they needed for the final output could have taken the same time if done manually in case of last minute changes like addition or removal of a member that too if a head of the family expired and has to be updated before taking final output the whole prayer group sorting can affect. Consider the head of the family name was starting with Z and when removed automatic upgrade of the next member to head of family and the name starts with A the whole prayer group layout has a chance to take drastic change and manual layout would be herculian in this case. But with this implementation of automation, that is another 15 minutes to the maximum just a flag change in the xls and the command line “make directory” will run through the full process.

Workflow Overview

The project involves converting an xls file containing membership data into a print-ready PDF. The data and member photographs are maintained by a volunteer team on Google Sheets and google drive, these are shared via Google Drive. Each family has a unique register number, and members are assigned serial numbers for photo organization. The workflow is orchestrated using GNU Make, with specific tasks divided into stages for better manageability.

Stage 1: Photo Processing

Tools Used:

  • Bash Shell Scripts for automation
  • ImageMagick for photo dimension checking and resizing

The photo directory is processed using identify (ImageMagick) to determine the dimensions of each image. This ensures that all photos meet the required quality (300 DPI for print). Images that are too large or too small are adjusted using convert, ensuring consistency across all member profiles.

Stage 2: Importing Data into MySQL

Tools Used:

  • MySQL for data management
  • Libre Office Calc to export xls to csv
  • Bash and PHP Scripts for CSV import

The exported CSV data is imported into a MySQL database. This allows for sorting, filtering, and advanced layout calculations, providing a structured approach to organizing the data.

Stage 3: Data Sorting and Layout Preparation

Tools Used:

  • MySQL Queries for layout calculations

The data is grouped and sorted based on location and family register numbers. For each member, a layout height and page number are calculated and updated in the database. This ensures a consistent and visually appealing directory design.

Stage 4: PDF Generation

Tools Used:

  • PHP and FPDF Library

Using PHP and FPDF, the data is read from MySQL, and PDFs are generated for each of the 12 location-based groups. During this stage, indexes are also created to list register numbers and member names alongside their corresponding page numbers.

Stage 5: Final Assembly and Indexing

Tools Used:

  • GNU Make for orchestration
  • PDF Merge Tools

The 12 individual PDFs generated in the previous stage are stitched together into a single document. The two indexes (by register number and by member name) are combined and appended to the final PDF. This single document is then ready for print.

Efficiency Achieved

Running the entire workflow on an ASUS A17 with XUbuntu, the process completes in less than 13 minutes. By comparison, a traditional approach using desktop publishing (DTP) software could take 20–30 hours, even with a skilled team working in parallel. The automated workflow eliminates manual errors, ensures uniformity, and significantly improves productivity.

Key Advantages of the Automated Workflow

  1. Time Efficiency: From 20–30 hours to 13 minutes.
  2. Accuracy: Eliminates manual errors through automation.
  3. Scalability: Easily accommodates future data updates or layout changes.
  4. Cost-Effective: Utilizes free and open-source tools.
  5. Repeatability: The process can be executed multiple times with minimal adjustments.

Tools and Technology Stack

  • Operating System: XUbuntu on ASUS A17
  • Photo Processing: ImageMagick (identify and convert)
  • Database Management: MySQL
  • Scripting and Automation: Bash Shell, GNU Make
  • PDF Generation: PHP, FPDF Library
  • File Management: Google Drive for data sharing

Conclusion

This project highlights the power of automation in handling repetitive and labor-intensive tasks. By leveraging open-source tools and orchestrating the workflow with GNU Make, the entire process became not only faster but also more reliable. This method can serve as a template for similar projects, inspiring others to embrace automation for efficiency gains.

Feel free to share your thoughts or ask questions in the comments below. If you’d like to adopt a similar workflow for your organization, I’d be happy to provide guidance!

Creating a Dynamic Image Animation with PHP, GIMP, and FFmpeg: A Step-by-Step Guide

Introduction

In this blog post, I’ll walk you through a personal project that combines creative image editing with scripting to produce an animated video. The goal was to take one image from each year of my life, crop and resize them, then animate them in a 3×3 grid. The result is a visually engaging reel targeted for Facebook, where the images gradually transition and resize into place, accompanied by a custom audio track.

This project uses a variety of tools, including GIMP, PHP, LibreOffice Calc, ImageMagick, Hydrogen Drum Machine, and FFmpeg. Let’s dive into the steps and see how all these tools come together.

Preparing the Images with GIMP

The first step was to select one image from each year that clearly showed my face. Using GIMP, I cropped each image to focus solely on the face and resized them all to a uniform size of 1126×1126 pixels.

I also added the year in the bottom-left corner and the Google Plus Code (location identifier) in the bottom-right corner of each image. To give the images a scrapbook-like feel, I applied a torn paper effect around the edges. Which was generated using Google Google Gemini using prompt “create an image of 3 irregular vertical white thin strips on a light blue background to be used as torn paper edges in colash” #promptengineering

Key actions in GIMP:

  • Crop and resize each image to the same dimensions.
  • Add text for the year and location.
  • Apply a torn paper frame effect for a creative touch.

Organizing the Data in LibreOffice Calc

Before proceeding with the animation, I needed to plan out the timing and positioning of each image. I used LibreOffice Calc to calculate:

  • Frame duration for each image (in relation to the total video duration).
  • The positions of each image in the final 3×3 grid.
  • Resizing and movement details for each image to transition smoothly from the bottom to its final position.

Once the calculations were done, I exported the data as a JSON file, which included:

  • The image filename.
  • Start and end positions.
  • Resizing parameters for each frame.

Automating the Frame Creation with PHP

Now came the fun part: using PHP to automate the image manipulation and generate the necessary shell commands for ImageMagick. The idea was to create each frame of the animation programmatically.

I wrote a PHP script that:

  1. Reads the JSON file and converts it to PHP arrays, which were manually hard-coded into the generator script. This is to define the positioning and resizing data.
  2. Generates ImageMagick shell commands to:
  • Place each image on a 1080×1920 blank canvas.
  • Resize each image gradually from 1126×1126 to 359×375 over several frames.
  • Move each image from the bottom of the canvas to its final position in the 3×3 grid.

Here’s a snippet of the PHP code that generates the shell command for each frame:

This script dynamically generates ImageMagick commands for each image in each frame. The resizing and movement of each image happens frame-by-frame, giving the animation its smooth, fluid transitions.


Step 4: Creating the Final Video with FFmpeg

Once the frames were ready, I used FFmpeg to compile them into a video. Here’s the command I referred, for the exact project the filnenames and paths were different.

ffmpeg -framerate 30 -i frames/img_%04d.png -i audio.mp3 -c:v libx264 -pix_fmt yuv420p -c:a aac final_video.mp4

This command:

  • Takes the image sequence (frames/img_0001.png, frames/img_0002.png, etc.) and combines them into a video.
  • Syncs the video with a custom audio track created in Hydrogen Drum Machine.
  • Exports the final result as final_video.mp4, ready for Facebook or any other platform.

Step 5: The Final Touch — The 3×3 Matrix Layout

The final frame of the video is particularly special. All nine images are arranged into a 3×3 grid, where each image gradually transitions from the bottom of the screen to its position in the matrix. Over the course of a few seconds, each image is resized from its initial large size to 359×375 pixels and placed in its final position in the grid.

This final effect gives the video a sense of closure and unity, pulling all the images together in one cohesive shot.

Conclusion

This project was a fun and fulfilling exercise in blending creative design with technical scripting. Using PHP, GIMP, ImageMagick, and FFmpeg, I was able to automate the creation of an animated video that showcases a timeline of my life through images. The transition from individual pictures to a 3×3 grid adds a dynamic visual effect, and the custom audio track gives the video a personalized touch.

If you’re looking to create something similar, or just want to learn how to automate image processing and video creation, this project is a great starting point. I hope this blog post inspires you to explore the creative possibilities of PHP and multimedia tools!

The PHP Script for Image Creation

Here’s the PHP script I used to automate the creation of the frames for the animation. Feel free to adapt and use it for your own projects:

<?php

// list of image files one for each year
$lst = ['2016.png','2017.png','2018.png','2019.png','2020.png','2021.png','2022.png','2023.png','2024.png'];

$wx = 1126; //initial width
$hx = 1176; //initial height

$wf = 359;  // final width
$hf = 375;  // final height

// final position for each year image
// mapped with the array index
$posx = [0,360,720,0,360,720,0,360,720];
$posy = [0,0,0,376,376,376,752,752,752];

// initial implant location x and y
$putx = 0;
$puty = 744;

// smooth transition frames for each file
// mapped with array index
$fc = [90,90,90,86,86,86,40,40,40];

// x and y movement for each image per frame
// mapped with array index
$fxm = [0,4,8,0,5,9,0,9,18];
$fym = [9,9,9,9,9,9,19,19,19];

// x and y scaling step per frame 
// for each image mapped with index
$fxsc = [9,9,9,9,9,9,20,20,20];
$fysc = [9,9,9,10,10,10,21,21,21];

// initialize the file naming with a sequential numbering

$serial = 0;

// start by copying the original blank frame to ramdisk
echo "cp frame.png /dev/shm/mystage.png","\n";

// loop through the year image list

foreach($lst as $i => $fn){
    // to echo the filename such that we know the progress
    echo "echo '$fn':\n"; 

    // filename padded with 0 to fixed width
    $newfile = 'frames/img_' . str_pad($serial, 4,'0',STR_PAD_LEFT) . '.png';

// create the first frame of an year
    echo "composite -geometry +".$putx."+".$puty."  $fn /dev/shm/mystage.png  $newfile", "\n";

    $tmx = $posx[$i] - $putx;

    $tmy = $puty - $posy[$i];

    // frame animation
    $maxframe = ($fc[$i] + 1);
    for($z = 1; $z < $maxframe ; $z++){

        // estimate new size 
        $nw = $wx - ($fxsc[$i] * $z );
        $nh = $hx - ($fysc[$i] * $z );

        $nw = ($wf > $nw) ? $wf : $nw;
        $nh = ($hf > $nh) ? $hf : $nh;

        $tmpfile = '/dev/shm/resized.png';
        echo "convert $fn  -resize ".$nw.'x'.$nh.'\!  ' . $tmpfile . "\n";

        $nx = $putx + ( $fxm[$i] * $z );
        $nx = ($nx > $posx[$i]) ? $posx[$i] : $nx; 

        if($posy[$i] > $puty){
            $ny = $puty + ($fym[$i] * $z) ;
            $ny = ($ny > $posy[$i]) ? $posy[$i] : $ny ;
        }else{
            $ny = $puty - ($fym[$i] * $z);
            $ny = ($posy[$i] > $ny) ? $posy[$i] : $ny ;
        }

        $serial += 1;
        $newfile = 'frames/img_' . str_pad($serial, 4,'0',STR_PAD_LEFT) . '.png';
        echo 'composite -geometry +'.$nx.'+'.$ny."  $tmpfile /dev/shm/mystage.png  $newfile", "\n";
    }

    // for next frame use last one
     // thus build the final matrix of 3 x 3
    echo "cp $newfile /dev/shm/mystage.png", "\n";
}

Creating a Time-lapse effect Video from a Single Photo Using Command Line Tools on Ubuntu

In this tutorial, I’ll walk you through creating a timelapse effect video that transitions from dark to bright, all from a single high-resolution photo. Using a Samsung Galaxy M14 5G, I captured the original image, then manipulated it using Linux command-line tools like ImageMagick, PHP, and ffmpeg. This approach is perfect for academic purposes or for anyone interested in experimenting with video creation from static images. Here’s how you can achieve this effect. And note that this is just an academic exploration and to be used as a professional tool the values and frames should be defined with utmost care.

Basics was to find the perfect image, and crop it to 9:16 since I was targetting facebook reels and the 50 MP images taken on Samsung Galaxy M14 5G are at 4:3 with 8160×6120 and Facebook reels or YouTube shorts follow the format of 9:16 and 1080×1920 or proportionate dimensions. My final source image was 1700×3022 added here for reference. Had to scale it down to keep inside the blog aesthetics.

Step 1: Preparing the Frame Rate and Length
To begin, I decided on a 20-second video with a frame rate of 25 frames per second, resulting in a total of 500 frames. Manually creating the 500 frames was tedious and any professionals would use some kind of automation. Being a devops enthusiast and a linux fanatic since 1998 my choice was shell scripting. But addiction to php as an aftermath of usage since 2002 kicked up inside me and the following code nippet was the outcome.

Step 2: Generating Brightness and Contrast Values Using PHP
The next step was to create an array of brightness and contrast values to give the impression of a gradually brightening scene. Using PHP, I mapped each frame to an optimal brightness-contrast value. Here’s the PHP snippet I used:

<?php


$dur = 20;
$fps = 25;
$frames = $dur * $fps;
$plen = strlen(''.$frames) + 1;
$val = -50;
$incr = (60 / $frames);

for($i = 0; $i < $frames; $i++){
   $pfx =  str_pad($i, $plen, '0', STR_PAD_LEFT);

    echo $pfx, " ",round($val,2),"\n";

    $val += $incr;
}

?>

Being in ubuntu the above code saved as gen.php and after updating the values for duration and framerate this was executed from the cli and output redirected to a text file values.txt with the following command.

php -q gen.php > values.txt 

Now to make things easy, the source file was copied as src.jpg into a temporary folder and a sub-folder ‘anim’ was created to hold the frames. Here I already had a script which will resume from where left off depending on the situation. the script is as follows.

#!/bin/bash


gdone=$(find ./anim/ -type f | grep -c '.jpg')
tcount=$(grep -c "^0" values.txt)
todo=$(( $tcount - $gdone))

echo "done $gdone of ${tcount}, to do $todo more "

tail -$todo values.txt | while read fnp val 
do 
    echo $fnp
    convert src.jpg -brightness-contrast ${val} anim/img_${fnp}.jpg
done

The process is quite simple, first code line defines a var gdone by counting ‘.jpg’ files in the ‘anim’ sub-directory and then taking total count from values.txt the difference is to be done the status is echoed to output and a loop is initiated with reading the last todo lines from values.txt and executing the conversion using the convert utility of imagemagick. In case this needs to be interrupted, I just close the terminal window from xwindows, as a subsequent execution will continue from where leftoff. Once this is completed, the frames are stitched together using ffmpeg using the following commad.

ffmpeg -i anim/img_%04d.jpg -an -y ../output.mp4

The filename pattern %04d is decided from the width of number of frames plus 1 as in the php code the var $plen on code line 4 is taken for the str_pad function input padd length.

The properties of final output generated by ffmpeg is as follows. Note the dimensions, duration and frame rate do comply as decided on startup.

Playing with Gimp on Ubuntu and AI

Recently I decided to brush up my graphics exposure. Since long back I have had the opportunity to explore using Adobe Photoshop on Windows, and Gimp or Ink-Scape on Linux, Canva on Android and most recently with AI using leonardo AI and Microsoft Copilot. Will boast about all of these with examples and prompts used.

The recent exploration using Gimp follows.

The original images are as follows though the one used for top layer was taken on Samsung M14 and file type was hief and the size was too large for the upload limits set by me on this blog and is down sized to acceptable file size loosing some quality.

The road picture shown above is snatched from google and tweaked a bit. For mixing up the first picture of my and my car had to be converted to a rotoscopic one with unwanted area having single color or transparency. This was done in gimp by pasting on a second layer and adding alpha channel to the layer. Then using fuzz select “U” and “Selection Editor” menu and “shift” + “click” “Select -> Grow / Shrink / Remove Holes” menu items and “Tools -> Paint tools -> Eraser ” or “Shift + E” visually and manually erased all unwanted elements leaving out only me and my car in the layer. This layer ws further resized after reducing the opacity to see how it matched the road picture, once the proportion was visibly satisfied the opacity was taken back to 100% and to finalize using “Tools -> Paint Tools -> Clone” and own visual decision some shadow from my Shirt was also stamped out to match the sun light angle in the road picture. Hope everything is visually okay.

Further playing with AI

A 90-year-old biker wearing full riding gear, including a leather jacket, helmet with a visor, gloves, and riding boots, sitting confidently on a large cruiser motorcycle. His weathered face shows deep lines of age, but his posture remains strong and determined. The motorcycle is a classic, chrome-laden cruiser, polished and shining under the sunlight. The backdrop features a vast, sprawling farm with rolling green fields, a rustic barn, and distant hills under a clear blue sky. The atmosphere is peaceful, yet the image exudes a sense of timeless adventure and freedom.

From the view of this image, I went to google photos on my device and searched for my images to choose the one included below

Original image taken on Samsung M14 and had 7.3 MB and 4896×5789 resolution so rescaled it to 1096×1296 and 1.1 mb to fit into this blog.

from the image only the face was selected with gimp Tools -> Selection Tools -> Rectangle Select “R”, I always use the hot key “r” and was copied into the other AI rendered image as a new layer. This was scaled to fit the size after erasing unwanted edges and the final image is as follows.

Well there are more to it and that will be another story.