Exploring AI to the deep end – Facebook Reels

Today was exploring more of AI tools and many more.

Using chat-gpt generated a prompt for leonardo ai to create a subtle scenery.

Using GIMP on Ubuntu the scene was upscaled and cropped to 810:1440 ie 9:16 resolution. Used AI Music to generate a 30 second lo-fi bgm.mp3. using a PHP script generated 840 lines in format fname brightness contrast with values in a gradual change. This information was used in a loop for invoking imagemagic convert and create 840 frames. finally ffmpeg -i “%04d.jpg” -i bgm.mp3 -r 30 dusk.mp4. since frame rate is 30 and frames are 840, the video is of length 28 seconds and can be shared on facebook as a reel. That was my target.

Prompt in Chat GPT:

Suggest a detailed prompt for leonardo ai to generate a scenic view of country side just before sunset and the sun is behind the viewer.

The response, trimmed to the relevant portion which was further given to Leonardo AI:

A breathtaking countryside landscape bathed in the warm glow of the golden hour, just before sunset. The sun is behind the viewer, casting long, soft shadows over rolling green hills. A winding dirt road leads through fields of wildflowers in shades of lavender, yellow, and white, gently swaying in the breeze. A rustic wooden fence lines the path, guiding the eye toward a quaint farmhouse with a red roof and smoke curling from its chimney. Lush trees with golden-hued leaves dot the horizon, their branches swaying gently. A calm river reflects the soft, pastel hues of the evening sky—lavender, peach, and rose gold—while birds soar gracefully in the distance. The scene exudes warmth, tranquility, and a sense of peaceful solitude.
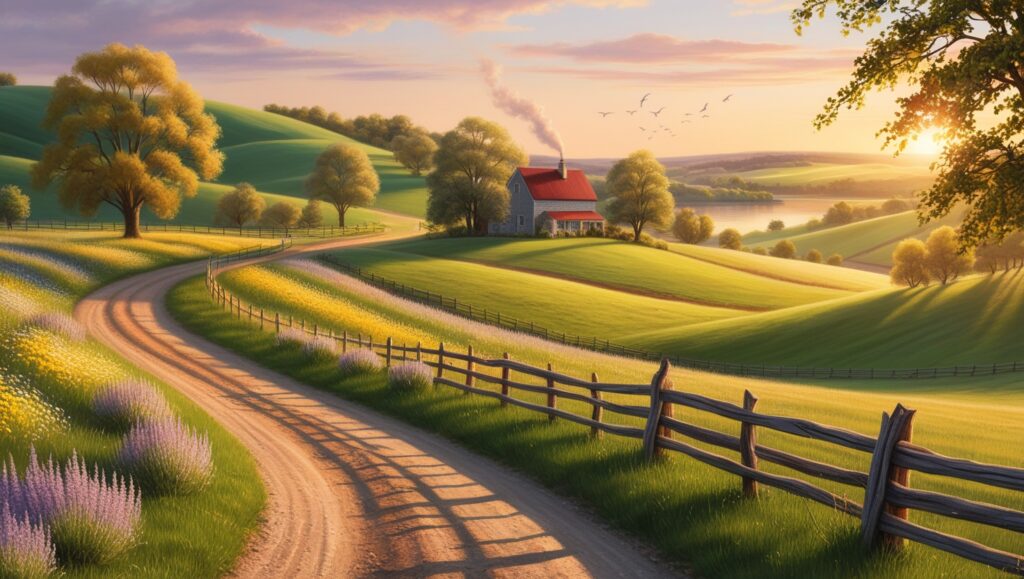
This was of dimension 1472×832 though I had set 16:9 resolution in the Leonardo image generator app.

Since I am on XUbuntu here I used GIMP to first upscale. As height required was 1440 the width proportionally came to 2548 once the scaling was done, chose canvas size from the image menu. setting width to 810 and position to center, since I needed 9:16 for Facebook reel.

Now for progressive frame generation a short script was written. For which the max thresholds were identified using GIMP. Colors -> Brightness & Contrast then in the slider, manually tweaking until the image was fully black. tried to fix these values to easy to calculate. And arrived at Brightness -120 and Contrast + 60. With a frame rate of 30 per second, a 28 second video will need 840 frames. So applying that brightness is 0 to -120 in 840 frames which evaluates to reduce by 1 in every 7 frames, whereas contrast is 0 to 60 and that evaluates to increase of 1 in every 14 frames. This was implemented using php scripting.

<?php

/*
brightness    0 => -120  7:1
Contrast      0 => 60   14:1

frames 840
*/

$list = range(1,840);

$bt = 0;
$ct = 0;

$bv = 0;
$cv = 0;

foreach($list as $sn){
   
   if($bt == 7){
   	$bv += 1;
   	$bt = 0;
   }
   
   if($ct == 14){
   	$cv += 1;
   	$ct = 0;
   }
      
   $bt++;
   $ct++;
   
   echo str_pad($sn, 4, '0', STR_PAD_LEFT)," $bv $cv","\n";
}

?>

This was further run from the command line and the output captured in a text file. Further a while loop creates the frames using image magik convert utility.

php -q bnc.php > list.txt

mkdir fg

cat list.txt | while read fi bv cv; do convert scene.jpg -brightness-contrast -${bv}x${cv} fg/${fi}.jpg ; done

cd fg
ffmpeg -i %04d.jpg -i /home/jijutm/Downloads/bgm-sunset.mp3 -r 30 ../sunset-reel.mp4

The bgm-sunset.mp3 was created using AI music generator and edited in audacity for special effects like fade in fade out etc.

Why this workflow is effective:

Automation: The PHP script and ImageMagick loop automate the tedious process of creating individual frames, saving a lot of time and effort.
Cost-effective: Using open-source tools like GIMP and FFmpeg keeps the cost down.
Flexibility: This approach gives a high degree of control over every aspect of the video, from the scenery to the music and the visual effects.
Efficient: By combining the strengths of different AI tools and traditional image/video processing software, this streamlined workflow is defined that gets the job done quickly and effectively.

The final reel on facebook page , see that also.

Conquering Time Limits: Speeding Up Dashcam Footage for Social Media with FFmpeg and PHP

Introduction:

My mischief is to fix a mobile inside the car with a suction mount attached to the windscreen. This mobile would capture video from start to finish of each trip. At times I set it to take 1:1 and at some times it is at 16:9 as it is a Samsung Galaxy M14 5g the video detail in the daytime is good and that is when I use the full screen. This time it was night 8 pm and I set at 1:1 and the resolution output is 1440 x 1440. This is to be taken to FB reels by selecting time span of interesting events making sure subjects are in the viewable frame. Alas, Facebook will take only 9:16 and a max of 30 seconds in the reels. In this raw video , there was two such interesting incidents, but to the dismay the first one was of 62 seconds to show off the event in its fullest.

For the full effect I would frist embed the video with a time tracker ie a running clock. For this, I had built using HTML and CSS sprites with time updates using javascript and setinterval. http://bz2.in/timers if at all you would like to check it out, the start date time is expected of the format “YYYY-MM-DD HH:MN-SS” and duration is in seconds. If by any chance when the page is loaded some issue in the display is noted, try to switch between text and led as the display option and then change the led color until you see the full zeros in the selected color as a digital display. Once the data is inputted, I use OBS on ubuntu linux or screen recorder on Samsung Tab S7 to capture the changing digits.

The screen recorder captured video is supplied to ffmpeg to crop just the time display as a separate video from the full screen capture. The frame does not change for each session. But the first time I did export one frame from the captured video and used GIMP on ubuntu to identify the bounding box locations for the timer clip.
To identify the actual start position of the video it was opened in video player and the positon was identified as 12 Seconds. Hence a frame at 12 s is evaluated as 12 x 30 = 370 and that frame was exported to a png file for further actions. I used the following command to export one frame.

ffmpeg -i '2025-02-04 19-21-30.mov' -vf "select=eq(n\,370)" -vframes 1 out.png

By opening this out.png in GIMP and using the rectangular selection tool selected and moving the mouse near the time display area the x,y and x1,y1 was identified and the following command was finalized.

ffmpeg -i '2025-02-04 19-21-30.mov' -ss 12 -t 30 -vf "crop=810:36:554:356" -q:v 0 -an timer.mp4

The skip (-ss 12) is identified manually by previewing the source file in the media player.

The relevant portion from the full raw video is also captured using ffmpeg as follows.

ffmpeg -i 20250203_201432.mp4 -ss 08:08 -t 62 -vf crop=810:1440:30:0 -an reels/20250203_201432_1.mp4

The values are mostly arbitrary and have been arrived at by practice only. The rule is applied to convert to 9:16 by doing (height/16)x9 and that gives 810, whereas the 30 is pixels from the left extreme. That is because I wanted the left side of the clip to be fully visible.

Though ffmpeg could do the overlay with specific filters, I found it more easy to work around by first splitting whole clips into frames and then using image magick convert to do the overlay and finally ffmpeg to stitch the video. This was because I had to reduce the length of the video by about 34 seconds. And this should happen only after the time tracker overlay is done. So the commands which I used are.

created few temporary folders

mkdir ff tt gg hh

ffmpeg -i clip.mp4 ff/%04d.png
ffmpeg -i timer.mp4 tt/%04d.png

cd ff

for i in *.png ; do echo $i; done > ../list.txt
cd ../

cat list.txt | while read fn; do convert ff/$fn tt/$fn -gravity North -composite gg/$fn; done

Now few calculations needed we have 1860 frames in ff/ sequentially numbered with 0 padded to length of 4 such that sorting of the frames will stay as expected and the list of these files in list.txt. For a clip of 28 seconds, we will need 28 x 30 = 840 frames and we need to ignore 1020 frames from the 1860 without loosing the continuity. For achieving this my favorite scripting language PHP was used.

<?php

/* 
this is to reduce length of reel to 
remove logically few frames and to 
rename the rest of the frames */

$list = @file('./list.txt');  // the list is sourced
$frames = count($list); // count of frames

$max = 28 * 30; // frames needed

$sc = floor($frames / $max);
$final = [];  // capture selected frames here
$i = 0;

$tr = floor($max * 0.2);  // this drift was arrived by trial estimation

foreach($list as $one){
  if($i < $sc){
     $i++;
  }else{
    $final[] = trim($one);
    $i = 0;
  }
  if(count($final) > $tr){
  	$sc = 1;
  }
}


foreach($final as $fn => $tocp){
   $nn = str_pad($fn, 4, '0', STR_PAD_LEFT) . '.png';
   echo $tocp,' ',$nn,"\n";
}

?>

The above code was run and the output was redirected to a file for further cli use.

php -q renf.php > trn.txt

cat trn.txt | while read src tgt ; do cp gg/$src hh/$tgt ; done

cd hh
ffmpeg -i %04d.png -r 30 ../20250203_201432_1_final.mp4

Now the reel is created. View it on facebook

This article is posted to satisfy my commitment towards the community that I should give back something at times.

Thankyou for checking this out.

Car Dash Cam to Facebook Reels – An interesting technology journey.

Well, it started to be a really interesting technology journey as I am a core and loyal Ubuntu Linux user. On top of that I always am on the lookout to sharpen my DevOps instincts and skillset. Some people do say that it is because that I am quite lazy to do repetitive tasks the manual way. I don’t care about these useless comments. The situation is that like all car dash cameras, this one also will record any activity in front or back of the car at a decent resolution of 1280 × 720 but as one file each 5 minute. The system’s inherent bug was that it won’t unmount the sdcard properly; hence, to get the files, it need to be mounted on a Linux USB sdcard reader. The commands that I used to combine and overlay these files were combined and formatted into a shell script as follows:

#!/bin/bash

 find ./1 -type f -size +0 | sort > ./fc.txt
 sed -i -e 's#./#file #' ./fc.txt 

 find ./2 -type f -size +0 | sort > ./bc.txt
 sed -i -e 's#./#file #' ./bc.txt 
 
 ffmpeg -f concat -safe 0 -i ./bc.txt -filter:v "crop=640:320:0:0,hflip"  bc.mp4
ffmpeg -f concat -safe 0 -i ./fc.txt -codec copy -an  fc.mp4

ffmpeg -i fc.mp4 -i bc.mp4 -filter_complex "[1:v]scale=in_w:-2[over];[0:v][over]overlay=main_w-overlay_w-50:50" -c:v libx264 "combined.mp4"

To explain the above shell script, the find (./1 and ./2) dash cam saves front cam files in “./1” and rear cam files in “./2” and the filters make sure only files with minimum size greater than 0 will be listed and as the filenames are timestamp based the sort will do its job. The sorted listing is written into fc.txt and then sed used to stamp each filename with a text “file” at the begening which is required for ffmpeg to combine a list of files. The lines 3 and 4 does the sequential combine of rear cam and front cam files and the final one resizes the rear cam file and inset over the front cam file at a calculated width from right side top offset of 50 pixels. This setup was working fine till recently when the car was parked for a long period in very hot area when the camera mount which was using a kind of suction to the windscreen failed and the camera came loose, destroying the touch screen and functionality. As I had already been hooked to the dashcam footage, I got a mobile mount and started using my Galaxy M14 mounted to the windscreen.

Now there is only one camera and that is the front one, but I start the recording before engaging gears from my garage and then stop it only after coming to a full halt at the destination. This is my policy and I don’t want to get distracted while driving. Getting a facebook reel of 9:16 and less than 30 seconds from this footage is not so tough as I need to crop only 405×720 but the frame start location in pixels as well as the timespan is critical. This part I am doing manually. Then it is just a matter of ffmpeg crop filter.

ffmpeg <input> -ss <start> -t <duration> -vf crop=405:720:600:0 -an <output>

In the above command, crop=width:height:x:y is the format and this was okay until the interesting subject was at a relative stable position. But sometimes ther subject will move from left to right and cropping has to happen in a pan motion. For this I chose the hard way.

  1. Crop the interesting portion of the video by timeline without resolution change.
  2. Split frames into png files ffmpeg <input> %04d.png as long as frames are less than 1000 (duration * 30) 4 should be okay if not the padding has to be increased.
  3. Create a pan frame configuration in a text file with framefile x y on each line.
  4. Use image magic convert by looping through the above file say pos.txt
cat pos.txt | while read fn x y ; do convert ff/$fn -crop 405x720+$x+$y gg/$fn

Once this is completed, then use the following command to create the cropped video with pan effect.

ffmpeg -i ff/%04d.png -r 30 cropped.mp4

Well by this weekend I had the urge to enhance it a bit more, with a running clock display along the top or bottom of every post-processed video. For the same after some thoughts I created an html page with some built in preference tweaks saving all such tweaks into localstore effectively avoiding any serverside database or the sort. I have been benefitted by the Free and Open Source movement, and I feel it is my commitment to provide back. Hence the code is hosted on AWS S3 website with no restriction. Check out the mock clock display and if interested view the source also.

With the above said html, a running clock display starting from a timestamp and runs for a supplied duration with selected background and foreground colors and font size etc is displayed on the browser. I capture this video using OBS on my laptop, builtin screen recorder on my Samsung Galaxy Tab S7 FE and then use ffmpeg to crop the exact time display from the full screen video. This video is also split into frames and corresponding frames overlayed on top of the reel clip frame also using convert and the pos.txt for the filenames.

cat pos.txt | while read fn x y ; do convert gg/$fn tt/$fn -gravity North -composite gt/$fn ; done

The gravity – “North” places the second input at the top of the first input whereas “South” will place at the bottom, similarly “East” and “West” and “Center” is also available.

Creating a Time-lapse effect Video from a Single Photo Using Command Line Tools on Ubuntu

In this tutorial, I’ll walk you through creating a timelapse effect video that transitions from dark to bright, all from a single high-resolution photo. Using a Samsung Galaxy M14 5G, I captured the original image, then manipulated it using Linux command-line tools like ImageMagick, PHP, and ffmpeg. This approach is perfect for academic purposes or for anyone interested in experimenting with video creation from static images. Here’s how you can achieve this effect. And note that this is just an academic exploration and to be used as a professional tool the values and frames should be defined with utmost care.

Basics was to find the perfect image, and crop it to 9:16 since I was targetting facebook reels and the 50 MP images taken on Samsung Galaxy M14 5G are at 4:3 with 8160×6120 and Facebook reels or YouTube shorts follow the format of 9:16 and 1080×1920 or proportionate dimensions. My final source image was 1700×3022 added here for reference. Had to scale it down to keep inside the blog aesthetics.

Step 1: Preparing the Frame Rate and Length
To begin, I decided on a 20-second video with a frame rate of 25 frames per second, resulting in a total of 500 frames. Manually creating the 500 frames was tedious and any professionals would use some kind of automation. Being a devops enthusiast and a linux fanatic since 1998 my choice was shell scripting. But addiction to php as an aftermath of usage since 2002 kicked up inside me and the following code nippet was the outcome.

Step 2: Generating Brightness and Contrast Values Using PHP
The next step was to create an array of brightness and contrast values to give the impression of a gradually brightening scene. Using PHP, I mapped each frame to an optimal brightness-contrast value. Here’s the PHP snippet I used:

<?php


$dur = 20;
$fps = 25;
$frames = $dur * $fps;
$plen = strlen(''.$frames) + 1;
$val = -50;
$incr = (60 / $frames);

for($i = 0; $i < $frames; $i++){
   $pfx =  str_pad($i, $plen, '0', STR_PAD_LEFT);

    echo $pfx, " ",round($val,2),"\n";

    $val += $incr;
}

?>

Being in ubuntu the above code saved as gen.php and after updating the values for duration and framerate this was executed from the cli and output redirected to a text file values.txt with the following command.

php -q gen.php > values.txt 

Now to make things easy, the source file was copied as src.jpg into a temporary folder and a sub-folder ‘anim’ was created to hold the frames. Here I already had a script which will resume from where left off depending on the situation. the script is as follows.

#!/bin/bash


gdone=$(find ./anim/ -type f | grep -c '.jpg')
tcount=$(grep -c "^0" values.txt)
todo=$(( $tcount - $gdone))

echo "done $gdone of ${tcount}, to do $todo more "

tail -$todo values.txt | while read fnp val 
do 
    echo $fnp
    convert src.jpg -brightness-contrast ${val} anim/img_${fnp}.jpg
done

The process is quite simple, first code line defines a var gdone by counting ‘.jpg’ files in the ‘anim’ sub-directory and then taking total count from values.txt the difference is to be done the status is echoed to output and a loop is initiated with reading the last todo lines from values.txt and executing the conversion using the convert utility of imagemagick. In case this needs to be interrupted, I just close the terminal window from xwindows, as a subsequent execution will continue from where leftoff. Once this is completed, the frames are stitched together using ffmpeg using the following commad.

ffmpeg -i anim/img_%04d.jpg -an -y ../output.mp4

The filename pattern %04d is decided from the width of number of frames plus 1 as in the php code the var $plen on code line 4 is taken for the str_pad function input padd length.

The properties of final output generated by ffmpeg is as follows. Note the dimensions, duration and frame rate do comply as decided on startup.

Solution for a personal problem

My car dash cam is a peculiar one bought off amazon.com forgot its name. Something like petzio and an old model. Does not have wifi nor does it unmount the microsd card. Hence taking it out and inserting into a linux laptop is the only way to recover the recordings. Even then the last file if not stopped recording before ignition off will be corrupt with no proper header. Also the rear cam records only mirror image with time stamp embedded and at resolution 640×480. I have my own shell script to convert the front and back files and combine them with rear camera view flipped and cropped at 640×320 and scaled down to embed into the front camera combined file.

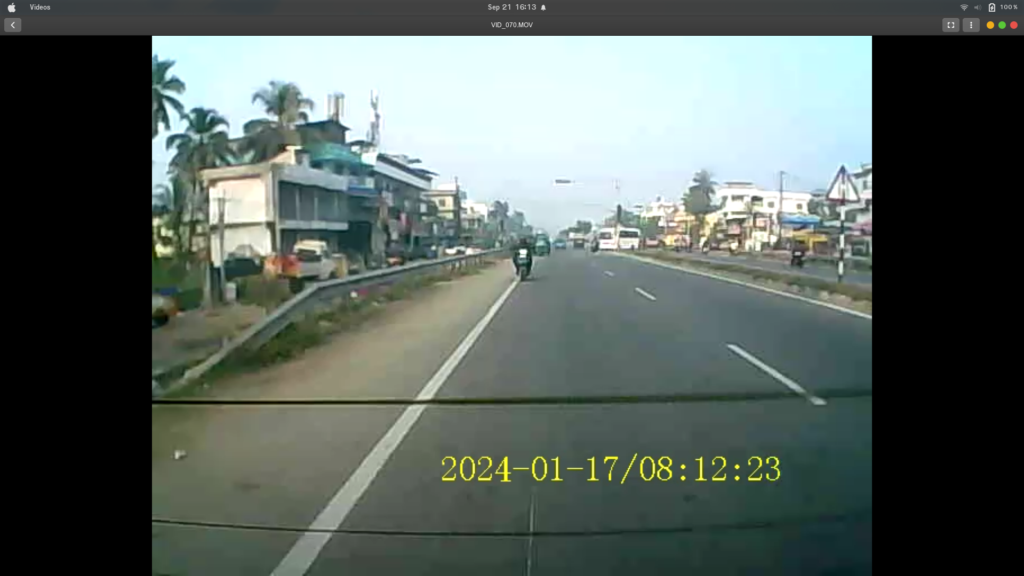
Recently I had few requirements to keep the rear cam feed as a flipped and cropped separate file with correct timestamp embedded. Had thought about this for long and found a solution using a combination of php, imagemagic and ffmpeg to generate a time stamp embedded sequence. Will show off the screenshots one by one and explain.

The above is a screenshot of the raw file being played and one can see that it seems my car as well as the biker is on the wrong side of the road, because this video is a mirror image and needs flipping. But as the timestamp is embedded, flipping will render the timestamp unusable. So an ffmpeg command is run as below.

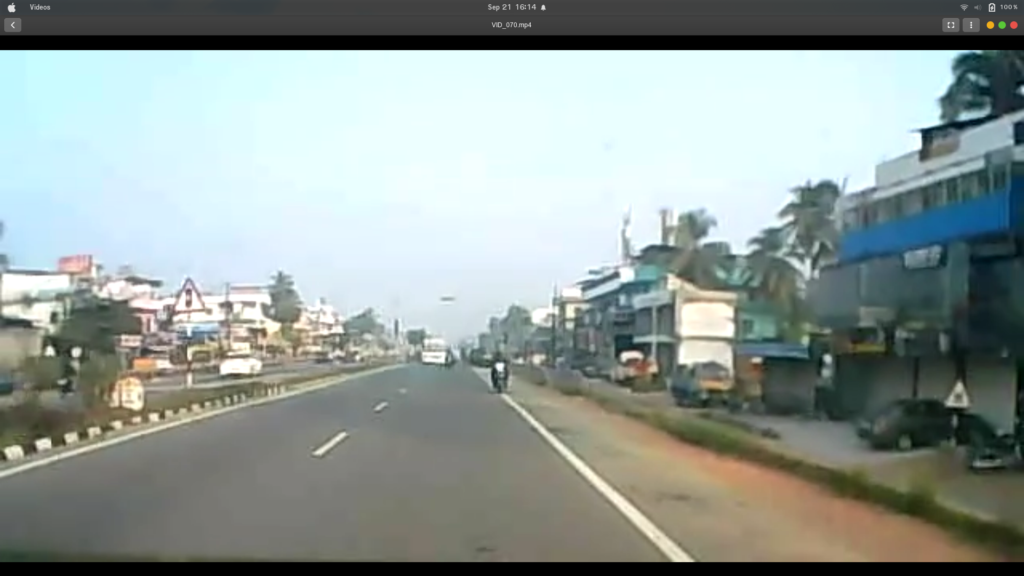
ffmpeg -i input.mov -filter:v "crop=640:320:0:0,hflip"  bc.mp4

This one image is the flipped note hflip in the ffmpeg video filter and the crop also to cut away the timestamp.

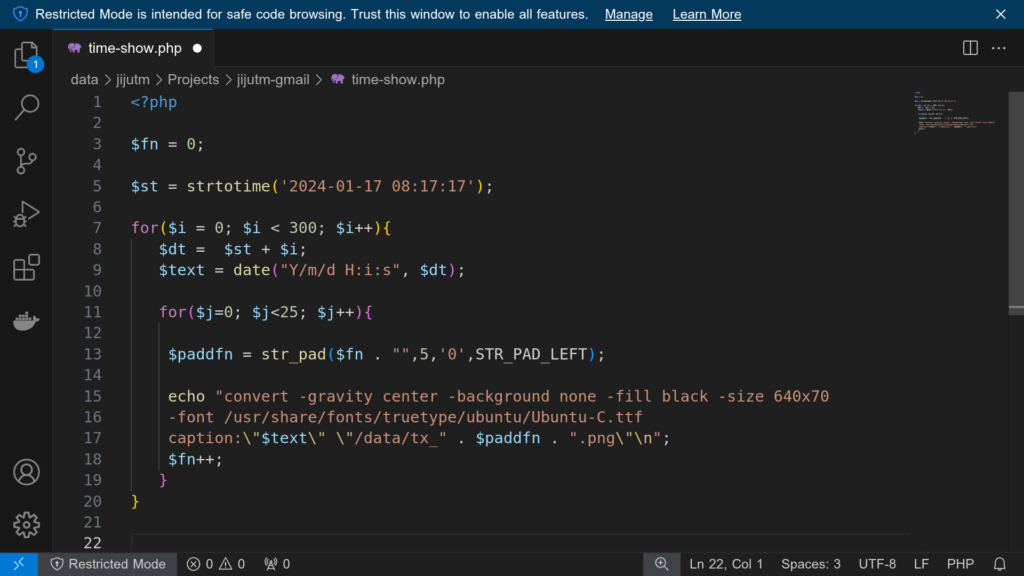
The above is a screenshot from vscode editor with the php code which I used to generate the timestamps but actually for another video as the start time is a bit skewed and the final echo contains the imagemagick command which is piped to /bin/bash to generate 25 frames for each second and finally ffmpeg is used to create the combined video from the sequence of zero padded files with following command

ffmpeg -y -i tx_%05d.png -hide_banner -c:v libx264 -r 25 -pix_fmt yuv420p timex.mp4

Original cropped and flipped file is now overlayed with this time stamp video again with ff-mpeg. The command which worked for me is as follows.

ffmpeg -i bc.mp4 -i timex.mp4 -filter_complex "[1:v]scale=in_w:-2[over];[0:v][over]overlay=0:270" -c:v libx264 "combined.mp4"

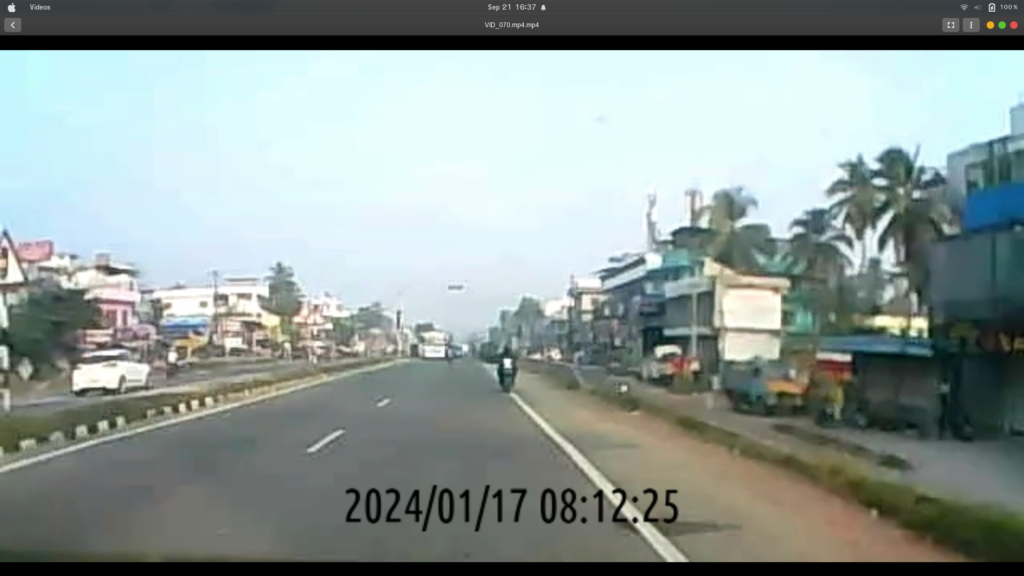
Screen shot from the final output more or less at the same point in the video

A Googly MySQL Cluster Talk

Google TechTalks April 28, 2006 Stewart Smith Stewart Smith works for MySQL AB as a software engineer working on MySQL Cluster. He is an active member of the free and open source software community, especially in Australia. ABSTRACT Part 1 – Introduction to MySQL Cluster The NDB storage engine (MySQL Cluster) is a high-availability storage engine for MySQL. It provides synchronous replication between storage nodes and many mysql servers having a consistent view of the database. In 4.1 and 5.0 it’s a main memory database, but in 5.1 non-indexed attributes can be stored on disk. NDB also provides a lot of determinism in system resource usage. I’ll talk a bit about that. Part 2 – New features in 5.1 including cluster to cluster replication, disk based data and a bunch of other things. anybody that is attending the mysql users conference may find this eerily familiar.
Continue reading “A Googly MySQL Cluster Talk”

Performance Tuning Best Practices for MySQL

Google TechTalks April 28, 2006 Jay Pipes Jay Pipes is a co-author of the recently published Pro MySQL (Apress, 2005), which covers all of the newest MySQL 5 features, as well as in-depth discussion and analysis of the MySQL server architecture, storage engines, transaction procesing, benchmarking, and advanced SQL scenarios. You can also see his name on articles appearing in Linux Magazine and can read more articles about MySQL at his website. ABSTRACT Learn where to best focus your attention when tuning the performance of your applications and database servers, and how to effectively find the “low hanging fruit” on the tree of bottlenecks. It’s not rocket science, but with a bit of acquired skill and experience, and of course good habits, you too can do this magic! Jay Pipes is MySQL’s Community Relations Manager for North America.
Continue reading “Performance Tuning Best Practices for MySQL”