Exploring AI to the deep end – Facebook Reels

Today was exploring more of AI tools and many more.

Using chat-gpt generated a prompt for leonardo ai to create a subtle scenery.

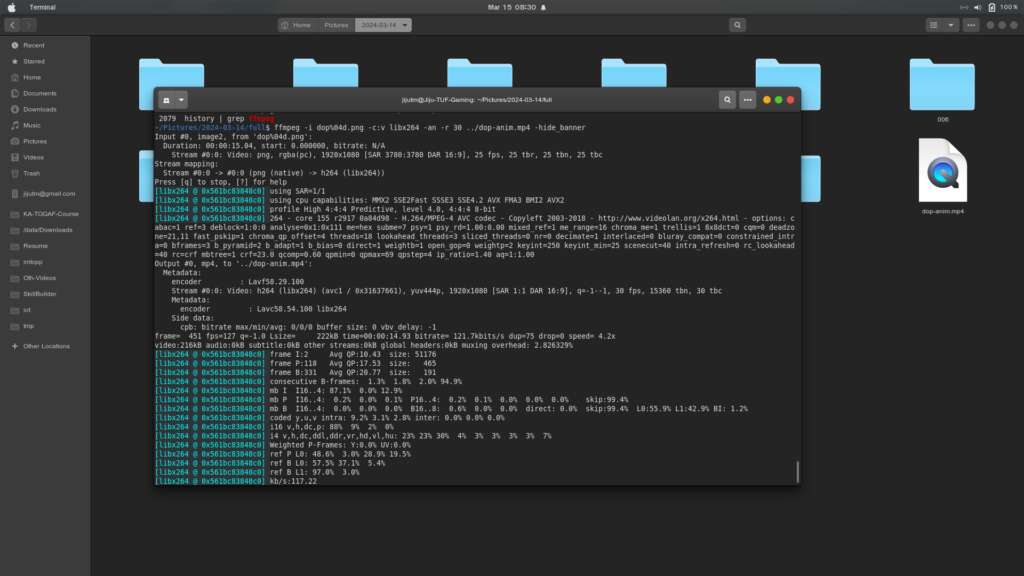
Using GIMP on Ubuntu the scene was upscaled and cropped to 810:1440 ie 9:16 resolution. Used AI Music to generate a 30 second lo-fi bgm.mp3. using a PHP script generated 840 lines in format fname brightness contrast with values in a gradual change. This information was used in a loop for invoking imagemagic convert and create 840 frames. finally ffmpeg -i “%04d.jpg” -i bgm.mp3 -r 30 dusk.mp4. since frame rate is 30 and frames are 840, the video is of length 28 seconds and can be shared on facebook as a reel. That was my target.

Prompt in Chat GPT:

Suggest a detailed prompt for leonardo ai to generate a scenic view of country side just before sunset and the sun is behind the viewer.

The response, trimmed to the relevant portion which was further given to Leonardo AI:

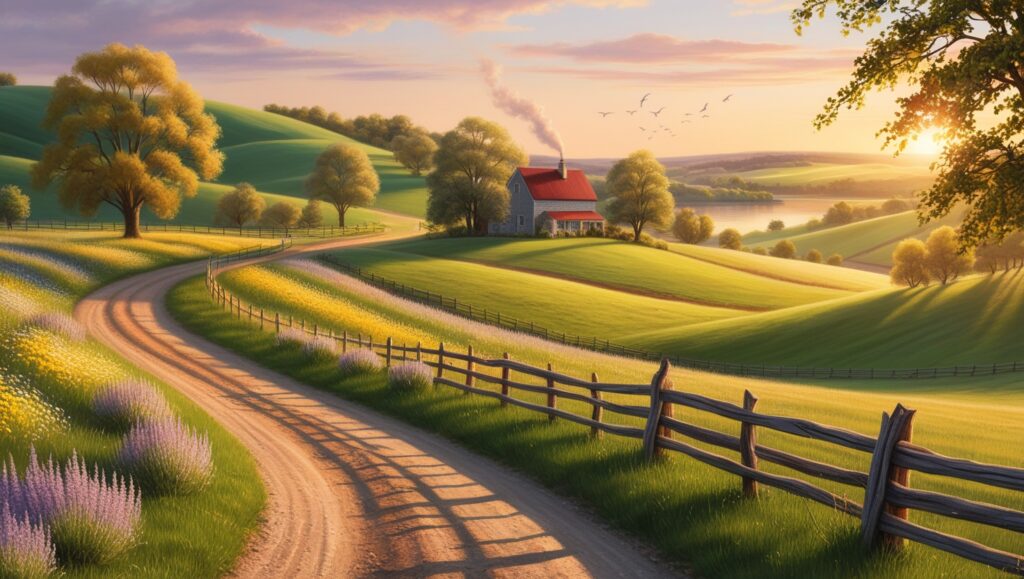
A breathtaking countryside landscape bathed in the warm glow of the golden hour, just before sunset. The sun is behind the viewer, casting long, soft shadows over rolling green hills. A winding dirt road leads through fields of wildflowers in shades of lavender, yellow, and white, gently swaying in the breeze. A rustic wooden fence lines the path, guiding the eye toward a quaint farmhouse with a red roof and smoke curling from its chimney. Lush trees with golden-hued leaves dot the horizon, their branches swaying gently. A calm river reflects the soft, pastel hues of the evening sky—lavender, peach, and rose gold—while birds soar gracefully in the distance. The scene exudes warmth, tranquility, and a sense of peaceful solitude.

This was of dimension 1472×832 though I had set 16:9 resolution in the Leonardo image generator app.

Since I am on XUbuntu here I used GIMP to first upscale. As height required was 1440 the width proportionally came to 2548 once the scaling was done, chose canvas size from the image menu. setting width to 810 and position to center, since I needed 9:16 for Facebook reel.

Now for progressive frame generation a short script was written. For which the max thresholds were identified using GIMP. Colors -> Brightness & Contrast then in the slider, manually tweaking until the image was fully black. tried to fix these values to easy to calculate. And arrived at Brightness -120 and Contrast + 60. With a frame rate of 30 per second, a 28 second video will need 840 frames. So applying that brightness is 0 to -120 in 840 frames which evaluates to reduce by 1 in every 7 frames, whereas contrast is 0 to 60 and that evaluates to increase of 1 in every 14 frames. This was implemented using php scripting.

<?php

/*
brightness    0 => -120  7:1
Contrast      0 => 60   14:1

frames 840
*/

$list = range(1,840);

$bt = 0;
$ct = 0;

$bv = 0;
$cv = 0;

foreach($list as $sn){
   
   if($bt == 7){
   	$bv += 1;
   	$bt = 0;
   }
   
   if($ct == 14){
   	$cv += 1;
   	$ct = 0;
   }
      
   $bt++;
   $ct++;
   
   echo str_pad($sn, 4, '0', STR_PAD_LEFT)," $bv $cv","\n";
}

?>

This was further run from the command line and the output captured in a text file. Further a while loop creates the frames using image magik convert utility.

php -q bnc.php > list.txt

mkdir fg

cat list.txt | while read fi bv cv; do convert scene.jpg -brightness-contrast -${bv}x${cv} fg/${fi}.jpg ; done

cd fg
ffmpeg -i %04d.jpg -i /home/jijutm/Downloads/bgm-sunset.mp3 -r 30 ../sunset-reel.mp4

The bgm-sunset.mp3 was created using AI music generator and edited in audacity for special effects like fade in fade out etc.

Why this workflow is effective:

Automation: The PHP script and ImageMagick loop automate the tedious process of creating individual frames, saving a lot of time and effort.
Cost-effective: Using open-source tools like GIMP and FFmpeg keeps the cost down.
Flexibility: This approach gives a high degree of control over every aspect of the video, from the scenery to the music and the visual effects.
Efficient: By combining the strengths of different AI tools and traditional image/video processing software, this streamlined workflow is defined that gets the job done quickly and effectively.

The final reel on facebook page , see that also.

Creating a Dynamic Image Animation with PHP, GIMP, and FFmpeg: A Step-by-Step Guide

Introduction

In this blog post, I’ll walk you through a personal project that combines creative image editing with scripting to produce an animated video. The goal was to take one image from each year of my life, crop and resize them, then animate them in a 3×3 grid. The result is a visually engaging reel targeted for Facebook, where the images gradually transition and resize into place, accompanied by a custom audio track.

This project uses a variety of tools, including GIMP, PHP, LibreOffice Calc, ImageMagick, Hydrogen Drum Machine, and FFmpeg. Let’s dive into the steps and see how all these tools come together.

Preparing the Images with GIMP

The first step was to select one image from each year that clearly showed my face. Using GIMP, I cropped each image to focus solely on the face and resized them all to a uniform size of 1126×1126 pixels.

I also added the year in the bottom-left corner and the Google Plus Code (location identifier) in the bottom-right corner of each image. To give the images a scrapbook-like feel, I applied a torn paper effect around the edges. Which was generated using Google Google Gemini using prompt “create an image of 3 irregular vertical white thin strips on a light blue background to be used as torn paper edges in colash” #promptengineering

Key actions in GIMP:

  • Crop and resize each image to the same dimensions.
  • Add text for the year and location.
  • Apply a torn paper frame effect for a creative touch.

Organizing the Data in LibreOffice Calc

Before proceeding with the animation, I needed to plan out the timing and positioning of each image. I used LibreOffice Calc to calculate:

  • Frame duration for each image (in relation to the total video duration).
  • The positions of each image in the final 3×3 grid.
  • Resizing and movement details for each image to transition smoothly from the bottom to its final position.

Once the calculations were done, I exported the data as a JSON file, which included:

  • The image filename.
  • Start and end positions.
  • Resizing parameters for each frame.

Automating the Frame Creation with PHP

Now came the fun part: using PHP to automate the image manipulation and generate the necessary shell commands for ImageMagick. The idea was to create each frame of the animation programmatically.

I wrote a PHP script that:

  1. Reads the JSON file and converts it to PHP arrays, which were manually hard-coded into the generator script. This is to define the positioning and resizing data.
  2. Generates ImageMagick shell commands to:
  • Place each image on a 1080×1920 blank canvas.
  • Resize each image gradually from 1126×1126 to 359×375 over several frames.
  • Move each image from the bottom of the canvas to its final position in the 3×3 grid.

Here’s a snippet of the PHP code that generates the shell command for each frame:

This script dynamically generates ImageMagick commands for each image in each frame. The resizing and movement of each image happens frame-by-frame, giving the animation its smooth, fluid transitions.


Step 4: Creating the Final Video with FFmpeg

Once the frames were ready, I used FFmpeg to compile them into a video. Here’s the command I referred, for the exact project the filnenames and paths were different.

ffmpeg -framerate 30 -i frames/img_%04d.png -i audio.mp3 -c:v libx264 -pix_fmt yuv420p -c:a aac final_video.mp4

This command:

  • Takes the image sequence (frames/img_0001.png, frames/img_0002.png, etc.) and combines them into a video.
  • Syncs the video with a custom audio track created in Hydrogen Drum Machine.
  • Exports the final result as final_video.mp4, ready for Facebook or any other platform.

Step 5: The Final Touch — The 3×3 Matrix Layout

The final frame of the video is particularly special. All nine images are arranged into a 3×3 grid, where each image gradually transitions from the bottom of the screen to its position in the matrix. Over the course of a few seconds, each image is resized from its initial large size to 359×375 pixels and placed in its final position in the grid.

This final effect gives the video a sense of closure and unity, pulling all the images together in one cohesive shot.

Conclusion

This project was a fun and fulfilling exercise in blending creative design with technical scripting. Using PHP, GIMP, ImageMagick, and FFmpeg, I was able to automate the creation of an animated video that showcases a timeline of my life through images. The transition from individual pictures to a 3×3 grid adds a dynamic visual effect, and the custom audio track gives the video a personalized touch.

If you’re looking to create something similar, or just want to learn how to automate image processing and video creation, this project is a great starting point. I hope this blog post inspires you to explore the creative possibilities of PHP and multimedia tools!

The PHP Script for Image Creation

Here’s the PHP script I used to automate the creation of the frames for the animation. Feel free to adapt and use it for your own projects:

<?php

// list of image files one for each year
$lst = ['2016.png','2017.png','2018.png','2019.png','2020.png','2021.png','2022.png','2023.png','2024.png'];

$wx = 1126; //initial width
$hx = 1176; //initial height

$wf = 359;  // final width
$hf = 375;  // final height

// final position for each year image
// mapped with the array index
$posx = [0,360,720,0,360,720,0,360,720];
$posy = [0,0,0,376,376,376,752,752,752];

// initial implant location x and y
$putx = 0;
$puty = 744;

// smooth transition frames for each file
// mapped with array index
$fc = [90,90,90,86,86,86,40,40,40];

// x and y movement for each image per frame
// mapped with array index
$fxm = [0,4,8,0,5,9,0,9,18];
$fym = [9,9,9,9,9,9,19,19,19];

// x and y scaling step per frame 
// for each image mapped with index
$fxsc = [9,9,9,9,9,9,20,20,20];
$fysc = [9,9,9,10,10,10,21,21,21];

// initialize the file naming with a sequential numbering

$serial = 0;

// start by copying the original blank frame to ramdisk
echo "cp frame.png /dev/shm/mystage.png","\n";

// loop through the year image list

foreach($lst as $i => $fn){
    // to echo the filename such that we know the progress
    echo "echo '$fn':\n"; 

    // filename padded with 0 to fixed width
    $newfile = 'frames/img_' . str_pad($serial, 4,'0',STR_PAD_LEFT) . '.png';

// create the first frame of an year
    echo "composite -geometry +".$putx."+".$puty."  $fn /dev/shm/mystage.png  $newfile", "\n";

    $tmx = $posx[$i] - $putx;

    $tmy = $puty - $posy[$i];

    // frame animation
    $maxframe = ($fc[$i] + 1);
    for($z = 1; $z < $maxframe ; $z++){

        // estimate new size 
        $nw = $wx - ($fxsc[$i] * $z );
        $nh = $hx - ($fysc[$i] * $z );

        $nw = ($wf > $nw) ? $wf : $nw;
        $nh = ($hf > $nh) ? $hf : $nh;

        $tmpfile = '/dev/shm/resized.png';
        echo "convert $fn  -resize ".$nw.'x'.$nh.'\!  ' . $tmpfile . "\n";

        $nx = $putx + ( $fxm[$i] * $z );
        $nx = ($nx > $posx[$i]) ? $posx[$i] : $nx; 

        if($posy[$i] > $puty){
            $ny = $puty + ($fym[$i] * $z) ;
            $ny = ($ny > $posy[$i]) ? $posy[$i] : $ny ;
        }else{
            $ny = $puty - ($fym[$i] * $z);
            $ny = ($posy[$i] > $ny) ? $posy[$i] : $ny ;
        }

        $serial += 1;
        $newfile = 'frames/img_' . str_pad($serial, 4,'0',STR_PAD_LEFT) . '.png';
        echo 'composite -geometry +'.$nx.'+'.$ny."  $tmpfile /dev/shm/mystage.png  $newfile", "\n";
    }

    // for next frame use last one
     // thus build the final matrix of 3 x 3
    echo "cp $newfile /dev/shm/mystage.png", "\n";
}

Exploring Animation Creation with GIMP, Bash, and FFmpeg: A Journey into Headphone Speaker Testing

For a long time, I had a desire to create a video that helps people confirm that their headphones are worn correctly, especially when there are no left or right indicators. While similar solutions exist out there, I decided to take this on as an exploration of my own, using tools I’m already familiar with: GIMP, bash, and FFmpeg.

This project resulted in a short animation that visually shows which speaker—left, right, or both—is active, syncing perfectly with the narration.

Project Overview:
The goal of the video was simple: create an easy way for users to verify if their headphones are worn correctly. The animation features:

  • “Hear on both speakers”: Animation shows pulsations on both sides.
  • “Hear on left speaker only”: Pulsations only on the left.
  • “Hear on right speaker only”: Pulsations only on the right.
  • Silence: No pulsations at all. Tools Used:
  • Amazon Polly for generating text-to-speech narration.
  • Audacity for audio channel switching.
  • GIMP for creating visual frames of the animation.
  • Bash scripting to automate the creation of animation sequences.
  • FFmpeg to compile the frames into the final video.
  • LibreOffice Calc to calculate frame sequences for precise animation timing. Step-by-Step Workflow:
  1. Creating the Audio Narration:
    Using Amazon Polly, I generated a text-to-speech audio file with the necessary instructions. Polly’s lifelike voice makes it easy to understand. I then used Audacity to modify the audio channels, ensuring that the left, right, and both channels played at the appropriate times.
  2. Synchronizing Audio and Visuals:
    I needed the animation to sync perfectly with the audio. To achieve this, I first identified the start and end of each segment in the audio file and created a spreadsheet in LibreOffice Calc. This helped me calculate the number of frames per segment, ensuring precise timing for the animation.
  3. Creating Animation Frames in GIMP:
    The visual animation was created using a simple diaphragm depression effect. I made three frames in GIMP:
  • One for both speakers pulsating,
  • One for the left speaker only,
  • One for the right speaker only.
  1. Automation with Bash:
    Once the frames were ready, I created a guideline text using Gedit that outlined the sequence. I then used a bash while-read loop combined with a seq loop to generate 185 image files. These files followed a naming convention of anim_%03d.png, ensuring they were easy to compile later.
  2. Compiling with FFmpeg:
    After all frames were created, I used FFmpeg to compile the images into the final video. The result was a fluid, synchronized animation that matched the audio perfectly. The Finished Product:
    Here’s the final video that demonstrates the headphone speaker test:

https://youtu.be/_fskGicSSUQ

Why I Chose These Tools:
Being familiar with xUbuntu, I naturally gravitated toward tools that work seamlessly in this environment. Amazon Polly provided high-quality text-to-speech output, while Audacity handled the channel switching with ease. GIMP was my go-to for frame creation, and the combination of bash and FFmpeg made the entire animation process efficient and automated.

This project not only satisfied a long-held desire but also served as an exciting challenge to combine these powerful tools into one cohesive workflow. It was a satisfying dive into animation and audio synchronization, and I hope it can help others as well!

Conclusion:
If you’re into creating animated videos or simply exploring new ways to automate your creative projects, I highly recommend diving into tools like GIMP, bash, and FFmpeg. Whether you’re on xUbuntu like me or another system, the potential for customization is vast. Let me know if you found this helpful or if you have any questions!

Attempt to create animated representation of AWS DevOps pipeline

Though the title says something technical this is just a self-promotion and cheap boasting

Continuing with the boosting as I have been doing this for the past couple of days. No, I am not insane, but wanted to do this by hand and use some shell commands. Initially the scenes were identified as 10 and folders created with a base flowchart made using Libre Office Draw copied into each of the folders.

Finally the full image sequence was copied into “full” with renaming in sequence with the following command.

Before that, the same command was previewed using echo instead of cp as seen below.

And finally all images were in the “full” folder as below.

It was time to invoke ffmpeg as shown below.

ffmpeg -i dop%04d.png -c:v libx264 -an -r 30 ../dop-anim.mp4 -hide_banner

What could have been achieved with paid tools like Canva or many others, with some effort and free tools available with Ubuntu Linux achieved with minimal expense, without considering my work time earnings that should be a concern.