Exploring AI to the deep end – Facebook Reels

Today was exploring more of AI tools and many more.

Using chat-gpt generated a prompt for leonardo ai to create a subtle scenery.

Using GIMP on Ubuntu the scene was upscaled and cropped to 810:1440 ie 9:16 resolution. Used AI Music to generate a 30 second lo-fi bgm.mp3. using a PHP script generated 840 lines in format fname brightness contrast with values in a gradual change. This information was used in a loop for invoking imagemagic convert and create 840 frames. finally ffmpeg -i “%04d.jpg” -i bgm.mp3 -r 30 dusk.mp4. since frame rate is 30 and frames are 840, the video is of length 28 seconds and can be shared on facebook as a reel. That was my target.

Prompt in Chat GPT:

Suggest a detailed prompt for leonardo ai to generate a scenic view of country side just before sunset and the sun is behind the viewer.

The response, trimmed to the relevant portion which was further given to Leonardo AI:

A breathtaking countryside landscape bathed in the warm glow of the golden hour, just before sunset. The sun is behind the viewer, casting long, soft shadows over rolling green hills. A winding dirt road leads through fields of wildflowers in shades of lavender, yellow, and white, gently swaying in the breeze. A rustic wooden fence lines the path, guiding the eye toward a quaint farmhouse with a red roof and smoke curling from its chimney. Lush trees with golden-hued leaves dot the horizon, their branches swaying gently. A calm river reflects the soft, pastel hues of the evening sky—lavender, peach, and rose gold—while birds soar gracefully in the distance. The scene exudes warmth, tranquility, and a sense of peaceful solitude.
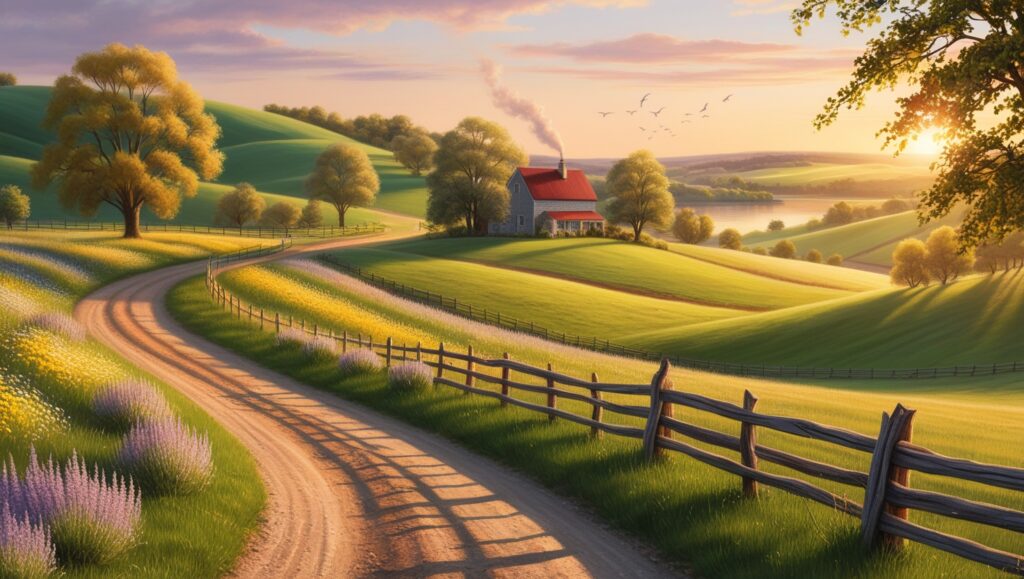
This was of dimension 1472×832 though I had set 16:9 resolution in the Leonardo image generator app.

Since I am on XUbuntu here I used GIMP to first upscale. As height required was 1440 the width proportionally came to 2548 once the scaling was done, chose canvas size from the image menu. setting width to 810 and position to center, since I needed 9:16 for Facebook reel.

Now for progressive frame generation a short script was written. For which the max thresholds were identified using GIMP. Colors -> Brightness & Contrast then in the slider, manually tweaking until the image was fully black. tried to fix these values to easy to calculate. And arrived at Brightness -120 and Contrast + 60. With a frame rate of 30 per second, a 28 second video will need 840 frames. So applying that brightness is 0 to -120 in 840 frames which evaluates to reduce by 1 in every 7 frames, whereas contrast is 0 to 60 and that evaluates to increase of 1 in every 14 frames. This was implemented using php scripting.

<?php

/*
brightness    0 => -120  7:1
Contrast      0 => 60   14:1

frames 840
*/

$list = range(1,840);

$bt = 0;
$ct = 0;

$bv = 0;
$cv = 0;

foreach($list as $sn){
   
   if($bt == 7){
   	$bv += 1;
   	$bt = 0;
   }
   
   if($ct == 14){
   	$cv += 1;
   	$ct = 0;
   }
      
   $bt++;
   $ct++;
   
   echo str_pad($sn, 4, '0', STR_PAD_LEFT)," $bv $cv","\n";
}

?>

This was further run from the command line and the output captured in a text file. Further a while loop creates the frames using image magik convert utility.

php -q bnc.php > list.txt

mkdir fg

cat list.txt | while read fi bv cv; do convert scene.jpg -brightness-contrast -${bv}x${cv} fg/${fi}.jpg ; done

cd fg
ffmpeg -i %04d.jpg -i /home/jijutm/Downloads/bgm-sunset.mp3 -r 30 ../sunset-reel.mp4

The bgm-sunset.mp3 was created using AI music generator and edited in audacity for special effects like fade in fade out etc.

Why this workflow is effective:

Automation: The PHP script and ImageMagick loop automate the tedious process of creating individual frames, saving a lot of time and effort.
Cost-effective: Using open-source tools like GIMP and FFmpeg keeps the cost down.
Flexibility: This approach gives a high degree of control over every aspect of the video, from the scenery to the music and the visual effects.
Efficient: By combining the strengths of different AI tools and traditional image/video processing software, this streamlined workflow is defined that gets the job done quickly and effectively.

The final reel on facebook page , see that also.

Conquering Time Limits: Speeding Up Dashcam Footage for Social Media with FFmpeg and PHP

Introduction:

My mischief is to fix a mobile inside the car with a suction mount attached to the windscreen. This mobile would capture video from start to finish of each trip. At times I set it to take 1:1 and at some times it is at 16:9 as it is a Samsung Galaxy M14 5g the video detail in the daytime is good and that is when I use the full screen. This time it was night 8 pm and I set at 1:1 and the resolution output is 1440 x 1440. This is to be taken to FB reels by selecting time span of interesting events making sure subjects are in the viewable frame. Alas, Facebook will take only 9:16 and a max of 30 seconds in the reels. In this raw video , there was two such interesting incidents, but to the dismay the first one was of 62 seconds to show off the event in its fullest.

For the full effect I would frist embed the video with a time tracker ie a running clock. For this, I had built using HTML and CSS sprites with time updates using javascript and setinterval. http://bz2.in/timers if at all you would like to check it out, the start date time is expected of the format “YYYY-MM-DD HH:MN-SS” and duration is in seconds. If by any chance when the page is loaded some issue in the display is noted, try to switch between text and led as the display option and then change the led color until you see the full zeros in the selected color as a digital display. Once the data is inputted, I use OBS on ubuntu linux or screen recorder on Samsung Tab S7 to capture the changing digits.

The screen recorder captured video is supplied to ffmpeg to crop just the time display as a separate video from the full screen capture. The frame does not change for each session. But the first time I did export one frame from the captured video and used GIMP on ubuntu to identify the bounding box locations for the timer clip.
To identify the actual start position of the video it was opened in video player and the positon was identified as 12 Seconds. Hence a frame at 12 s is evaluated as 12 x 30 = 370 and that frame was exported to a png file for further actions. I used the following command to export one frame.

ffmpeg -i '2025-02-04 19-21-30.mov' -vf "select=eq(n\,370)" -vframes 1 out.png

By opening this out.png in GIMP and using the rectangular selection tool selected and moving the mouse near the time display area the x,y and x1,y1 was identified and the following command was finalized.

ffmpeg -i '2025-02-04 19-21-30.mov' -ss 12 -t 30 -vf "crop=810:36:554:356" -q:v 0 -an timer.mp4

The skip (-ss 12) is identified manually by previewing the source file in the media player.

The relevant portion from the full raw video is also captured using ffmpeg as follows.

ffmpeg -i 20250203_201432.mp4 -ss 08:08 -t 62 -vf crop=810:1440:30:0 -an reels/20250203_201432_1.mp4

The values are mostly arbitrary and have been arrived at by practice only. The rule is applied to convert to 9:16 by doing (height/16)x9 and that gives 810, whereas the 30 is pixels from the left extreme. That is because I wanted the left side of the clip to be fully visible.

Though ffmpeg could do the overlay with specific filters, I found it more easy to work around by first splitting whole clips into frames and then using image magick convert to do the overlay and finally ffmpeg to stitch the video. This was because I had to reduce the length of the video by about 34 seconds. And this should happen only after the time tracker overlay is done. So the commands which I used are.

created few temporary folders

mkdir ff tt gg hh

ffmpeg -i clip.mp4 ff/%04d.png
ffmpeg -i timer.mp4 tt/%04d.png

cd ff

for i in *.png ; do echo $i; done > ../list.txt
cd ../

cat list.txt | while read fn; do convert ff/$fn tt/$fn -gravity North -composite gg/$fn; done

Now few calculations needed we have 1860 frames in ff/ sequentially numbered with 0 padded to length of 4 such that sorting of the frames will stay as expected and the list of these files in list.txt. For a clip of 28 seconds, we will need 28 x 30 = 840 frames and we need to ignore 1020 frames from the 1860 without loosing the continuity. For achieving this my favorite scripting language PHP was used.

<?php

/* 
this is to reduce length of reel to 
remove logically few frames and to 
rename the rest of the frames */

$list = @file('./list.txt');  // the list is sourced
$frames = count($list); // count of frames

$max = 28 * 30; // frames needed

$sc = floor($frames / $max);
$final = [];  // capture selected frames here
$i = 0;

$tr = floor($max * 0.2);  // this drift was arrived by trial estimation

foreach($list as $one){
  if($i < $sc){
     $i++;
  }else{
    $final[] = trim($one);
    $i = 0;
  }
  if(count($final) > $tr){
  	$sc = 1;
  }
}


foreach($final as $fn => $tocp){
   $nn = str_pad($fn, 4, '0', STR_PAD_LEFT) . '.png';
   echo $tocp,' ',$nn,"\n";
}

?>

The above code was run and the output was redirected to a file for further cli use.

php -q renf.php > trn.txt

cat trn.txt | while read src tgt ; do cp gg/$src hh/$tgt ; done

cd hh
ffmpeg -i %04d.png -r 30 ../20250203_201432_1_final.mp4

Now the reel is created. View it on facebook

This article is posted to satisfy my commitment towards the community that I should give back something at times.

Thankyou for checking this out.